Friday, February 13, 2015

Something Sweet and Something Spicy for a Go'Shay Mardi Gras


So most of you who follow me know that the reason my posts as Seattlepastrygirl have been few and far between is because I'm posting on my other blog as Roadtrekgirl. Sometimes there is crossover and this is one of those times.


I love to experiment and challenge myself with our meals while we are on the road.  And sometimes I get really ambitious and push myself and my little Roadtrek cooking area to the limit.  This week was one of those times.  We were on our way to meet up with a group of friends in Gautier, MS to celebrate Mardi Gras.  Everyone was bringing something and I volunteered to bring dessert and an appetizer.  I wanted to stick with the Mardi Gras theme so I came up with spicy deviled eggs for the appetizer-deviled eggs with Andouille sausage-yummy.


With the appetizer out of the way I searched the Internet and I couldn't find anything that struck my fancy, that is until I ran into Bananas Foster. Hmm, that had possibilities.  But what I needed to do was make it small enough to fit into our 3 way oven in the Roadtrek (its a microwave,convection and half time Apollo oven). Plus it needed to be easily stored since I would have to prepare it ahead of time and store it in our little space.  And of course I wanted it to be something easy and neat to serve-and thus my version of Bananas Foster Cupcakes !


I took a few recipes from all over the Internet and played with them until I came up with what I wanted for my cupcakes.  They turned out decadent and delicious.  I will warn you of two things. 1. Don't even ask how many calories are contained in each one; and 2. This is not a quick bake it and go recipe-it has multiple steps but each step is easy to accomplish.

Caramelized bananas being added to the pastry cream

Bananas Foster Pastry Cream
2 cups milk
1 vanilla bean
1/4 teaspoon salt
2 Tablespoons cornstarch
1 cup sugar
4 eggs
2 yolks
4 Tablespoons Butter
For the Caramelized Bananas
4 medium bananas
1/2 cup brown sugar
pinch of salt

2/3 cup whipped cream

Banana Instructions
1. Cut up the banana in to 1 inch pieces and toss with the brown sugar
2. Let it macerate it for ten minutes while the sugar draws the moisture out of the bananas.
3.Place the mixture in a heavy duty pan ( I used cast iron) and place it on to medium heat. Stir often, so that it does not burn. It will take about 15 minutes to cook. Really, stir ofter, it will get close to a medium amber color.
4. Spread the mixture out on a plate evenly and place in the refrigerator so it can cool. Now go and make the pastry cream.

Pastry Cream Instructions
1.Place the milk in a heavy bottomed pot with the scrapings of the vanilla bean as well as the whole pod. Turn that on and bring it to a scald. 
2. Place the eggs, cornstarch and sugar in a bowl and whisk together. Have ready a heat proof spatula, and a larger bowl that will fit the pastry cream. 
3. Cut up your butter and have it accessible.
4. Once the milk has come to a scald. Add small amounts of it to the egg mixture completely stirring in the milk before adding a small amount more. This helps to stop the eggs from scrambling
5. Once you have added about 1/4 a cup of milk to the eggs, add the egg mixture to the pot and mix until totally incorporated. Turn the heat on to medium high. With a combination of the whisk and the spatula stir constantly, mainly with the spatula. Making sure that bottom of the pan is constantly being stirred, because anything left to long directly on the bottom will scramble and burn. 
6. When four or five bubbles start to appear, it is ready,and it will be fairly thick. 
7. Turn it off and add the cut up butter. 
8. Put the the caramelized bananas into that large bowl you set aside and mix until smooth and then add pastry and cream and mix until smooth.
9. Chill this mixture overnight in a shallow dish, I put it inside 2 small bowls,since the refrigerator in a Roadtrek doesn't have a great deal of space.
10.Cover it with plastic,placing the plastic wrap directly onto the pastry cream so that it doesn’t form a skin.
11.The next day, whip the heavy whipping cream to soft peaks. Then with a spatula or bowl scraper gently fold the whip cream in to banana pastry cream mixture. Now it is ready to use.


Toasting the pecans in butter

Filling up my little cupcake cups

Butter Pecan Cupcakes
Ingredients

 2 cups chopped pecans
 1 1/4 cup salted butter (2 1/2 sticks) softened to room temperature
 2 cups granulated sugar
 4 large eggs
 1 TBS Butter Vanilla Emulsion (or plain vanilla extract)
 3 cups all purpose flour
 2 tsp baking powder
 1 cup whole milk
Instructions

1. Preheat oven to 350-use the convection control on the Half Time Oven. Line 24 muffin tins with liners or if you are using rigid cups like I did just set them up on the metal plate from the Half Time Over. You will have to bake them 12 at a time due to the size of the oven. Set aside.
2. Place 1/4 cup (1/2 stick) butter and pecans on a baking sheet. Bake for about 20 minutes, stirring frequently, until toasted. Remove from oven and let cool.
3. In a large bowl, combine flour and baking powder. Combine milk and emulsion (or extract) in a measuring glass. Set aside.
4. In the bowl of your mixer, beat 1 cup butter and sugar on medium speed until light and fluffy -- about 2 minutes. Add eggs one at a time, beating well after each. With the mixer on medium low, add flour and milk mixtures alternately, starting and ending with flour. Fold in the toasted pecans.
5. Fill muffin tins 2/3 full and bake for about 15 minutes or until tops spring back when lightly touched in the center. Remove to cooling rack to cool.
6. Once cool , use whatever tool you have, a teaspoon or knife to scoop out the center of the cupcake in order to make room for the banana pastry cream.
7. Fill the cupcakes with the pastry cream-I used a small spatula. Once filled also lightly ice the top layer of the cupcake with the remainder of the pastry cream.
8. Once you finish your buttercream icing, ice the cupcakes,then place a dehydrated banana slice in the center of the cupcake.  Let the cupcakes set up for about 1 hour before drizzling with caramel.
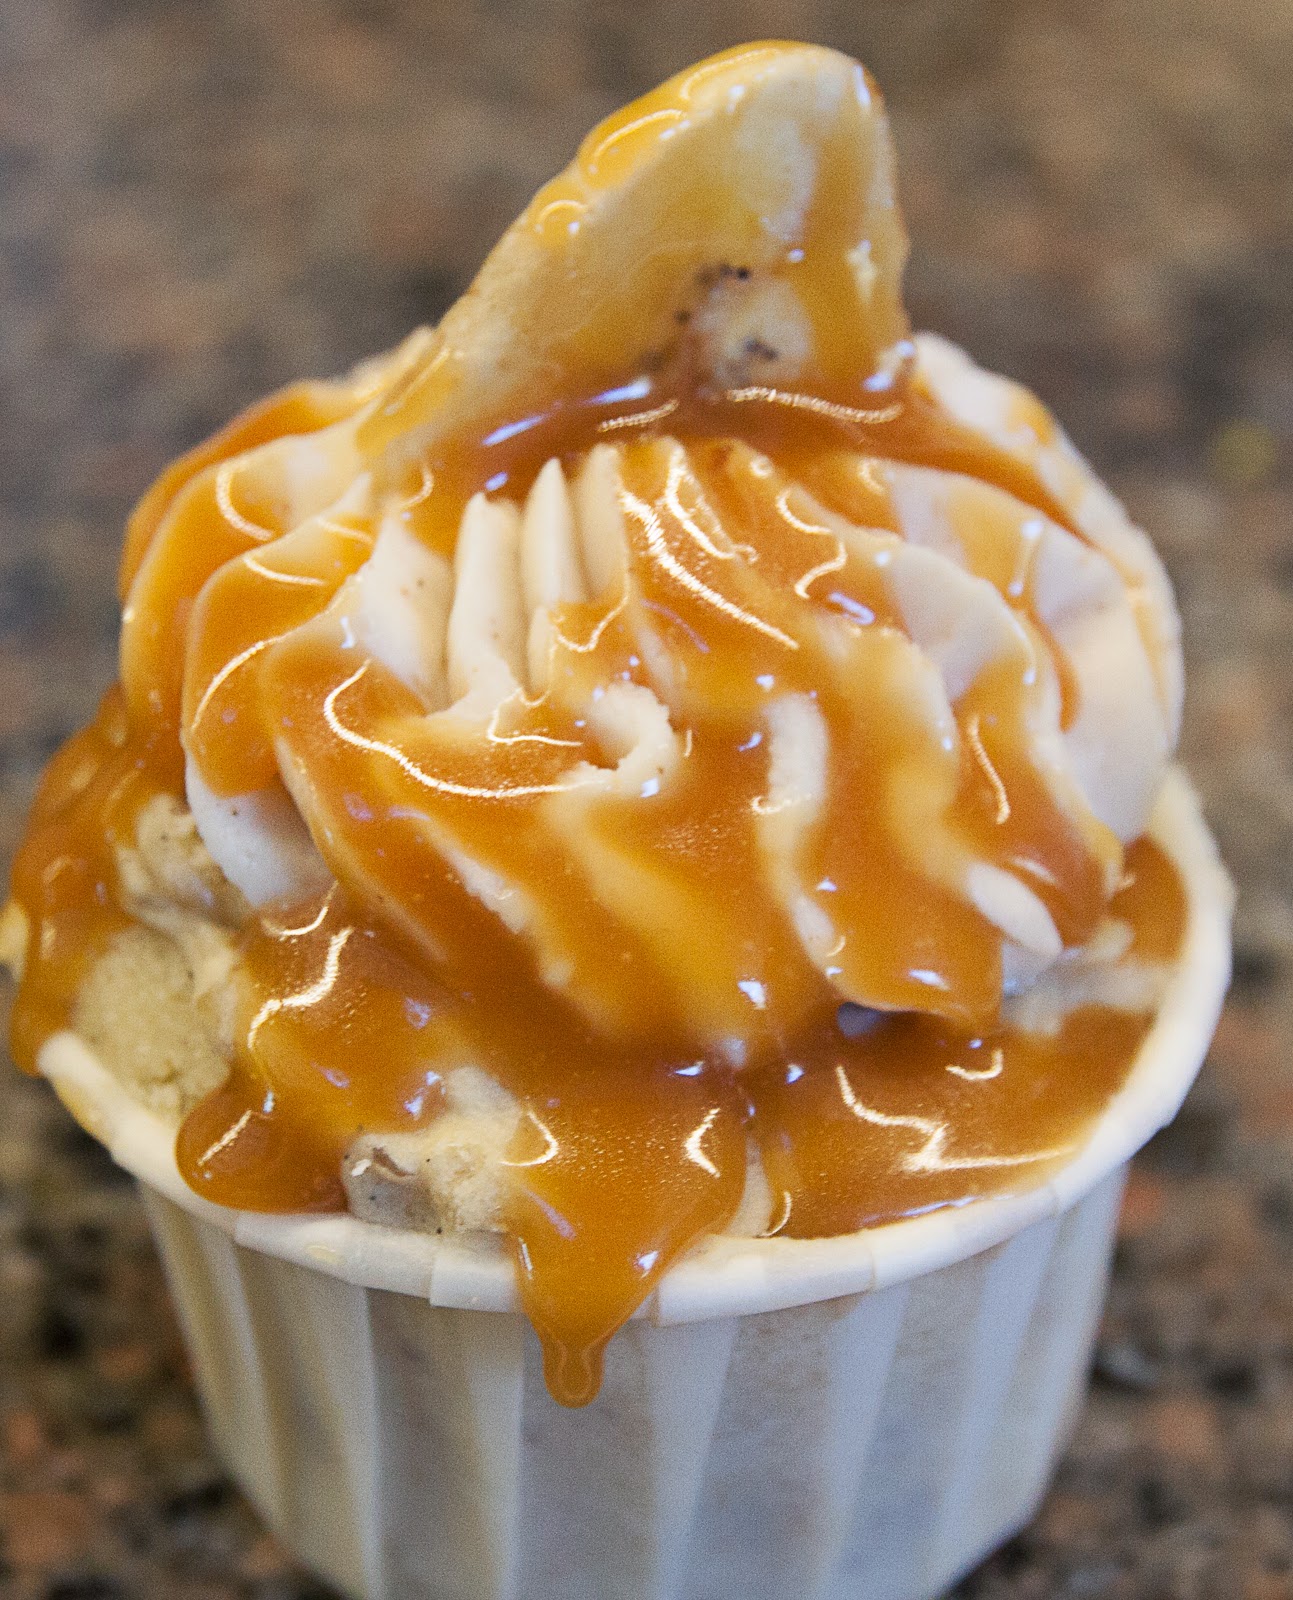
9. Once the caramel cools-about 45 minutes to an hour drizzle over the cupcakes, and voila , your masterpiece !

And here is that lovely amber caramel getting ready to drizzle on the cupcakes

Easy Caramel Sauce
From the Pioneer Woman
Ingredients
1 cup Brown Sugar
½ sticks Butter (4 Tablespoons)
½ cups Half-and-half Or Cream (cream Will Make It Thicker)
1 Tablespoon Vanilla
Pinch Of Salt
Preparation
Mix all ingredients in a medium saucepan over medium-low to medium heat. Cook
while whisking gently for 5 to 7 minutes, until thicker. Turn off heat. Let cool ,so that it doesn't melt your icing. (If sauce is thin, just continue cooking for a few more minutes.)


Kracken Black Spiced Rum Buttercream
Ingredients
1 cup unsalted butter, softened
5 cups powdered sugar
1 teaspoon cinnamon
1/2 teaspoon salt
1/2 cup spiced rum
1/4 cup heavy cream

Instructions
1. Whip the butter with a whisk attachment. 
2. Add the powdered sugar a cup at a time. 
3. After 3 cups add the cinnamon and salt. Beat to combine.
4. Add the rum
5. Add as much cream as you need to make the frosting the desired consistency. You are ready to ice those babies.

Lethal !

And for you savory types, here is the recipe  for the Spicy Andouille Deviled Eggs


Spicy Deviled Eggs
INGREDIENTS
1 tablespoon olive oil
1 package (13.5 ounce) Fully Cooked Andouille Sausage,diced
2 dozen eggs, hard­boiled
2  teaspoons Dijon mustard
1/3 cup mayonnaise
Several dashes of your favorite hot sauce
1/2 teaspoon kosher salt a few turns of freshly ground black pepper

DIRECTIONS
1.Heat oil in a large saute pan over medium­ high heat. When oil is shimmering, add diced
Andouille Sausage. Cook until well ­browned on all sides. Remove from pan with
slotted spoon; set aside to drain on paper towels.
2. Slice eggs in half lengthwise. Remove yolks and grate on small holes of box grater into mixing
bowl. Add mustard, mayonnaise, hot sauce, salt and pepper and mix thoroughly. Add yolk
mixture to a large seal able plastic bag.
3,Fill egg whites half way with diced sausage. Cut off tip of plastic bag and pipe yolk mixture into
the egg whites over diced sausage, over­filling the whites. Top yolk mixture with more diced
sausage.
4 Refrigerate until ready to serve.


Check out the Mardi Gras party I made these for at Roadtrekgirl. We had such a great time !  Bon Appetit everyone-see you can be a Roadtrek Chef !

Friday, January 9, 2015

Chocolate Chip Clouds


I think chocolate chip cookies were the first cookies I ever tasted. ( Not counting those nasty baby biscuits they used to give us in the 50's ).  And I think I've tried a hundred different recipes for making them. The recipe I finally settled on as my go to favorite chocolate chip cookie ever was David Lebovitz's recipe.  I wrote about it here. And that is still my favorite if you want a soft chewy on the inside, crisp on the outside then David is your man ! Now if you want to switch it up and have cookie that is a mound of soft airy chocolate then try this recipe.  I stumbled on it while surfing Pinterest-where else ?   I had been passing by it on many occasions and thought what the heck I should try this,people keep pinning it, maybe they know something I don't. Pssst, the secret ingredient is cream cheese !  Yes cream cheese-brilliant.


Once I whipped up the batter (and whip is a key term here), I thought oh know these are going to bake as flat as pancakes.  The batter was almost like whipped cream.  But I hung in there and refrigerated the scooped cookies for 2 hours.  And then like magic-they baked beautifully-not a single flat one in the batch. And these are definitely like eating a chocolate chip cloud.  Not bad.


I won't give up David's recipe because I happen to love the crisp slightly caramelized edges his recipe produces but these are nice for a change now and then. Thanks to Averie over at her blog : Averie Cooks for enticing me to make these-her results are gorgeous ! Try them, I'm sure you'll love them !

Soft Batch Cream Cheese Chocolate Chip Cookies
by Averie Cooks
INGREDIENTS:
1 /2 cup (1 stick) unsalted butter, softened
1 /4 cup cream cheese, softened (use cream cheese in a block or spreadable, don't use fat-free, light or whipped)
3/4 cup light brown sugar, packed
1 /4 cup granulated sugar
1 large egg
2 teaspoons vanilla extract
2 1 /4 cups all-purpose flour
2 teaspoons cornstarch
1 teaspoon baking soda
pinch salt, optional and to taste
2 1 /4 cups semi-sweet chocolate chips or chunks (I used 1 cup chips and 1 1 /4 cups chunks)
DIRECTIONS:
To the bowl of a stand mixer fitted with the paddle attachment, combine the butter, cream cheese (measure it by smooshing it into a 1 /4-cup measure), sugars, egg, vanilla, and beat on medium-high speed until well creamed,light and fluffy , about 5 minutes (or use an electric hand mixer and beat for at least 7 minutes).
Stop, scrape down the sides of the bowl, and add the flour, cornstarch, baking soda, optional salt, and mix until just combined, about 1 minute.
Add chocolate chips and chunks, and beat momentarily to incorporate, or fold in by hand.
Using a medium 2-inch cookie scoop, form heaping mounds (I doubled this recipe and made 48). Place mounds on a large plate, flatten mounds slightly with y our palm, cover with plastic wrap, and refrigerate for at least 2 hours, or up to 5 days,before baking. Do not bake with warm dough because cookies will spread and bake thinner and flatter.
Preheat oven to 350F, line a baking sheet with a Silpat Non-Stick Baking Mat ,or parchment paper or spray with cooking spray and place mounds on baking sheet, spaced at least 2 inches apart (I baked 12 cookies per sheet). Bake for 8 to 9 minutes, or until edges have set and tops are just beginning to set, even if slightly undercooked, pale and glossy(mine took 10 minutes)in the center. Do not bake longer than 10 minutes as cookies will firm up as they cool. Allow cookies to cool on the baking sheet for 5 minutes before removing and transferring to a rack to finish cooling.
Cookies will keep airtight at room temperature for up to 1 week, or in the freezer for up to 3 months.
Alternatively , unbaked cookie dough can be stored airtight in the refrigerator for up to 5 days.

Monday, December 22, 2014

Christmas Spirit


This is our first Christmas in the condo in Florida and I feel so blessed.  We have had a wonderful year,in spite of medical setbacks, we are two lucky people.  The only thing missing is our family.  We didn't realize being so far away was going to be so difficult. There were so many times I wish I could have jumped in a car to hold my sister or sit and laugh with my brother.  That's the reason we have put the condo up for sale.  The market here is so very slow, we probably won't get any bites until the Spring-and then we will be on the road. Such is life.
I've been trying to get in the Christmas mode, but it's been challenging.  I don't want to buy a tree because it's just another thing to haul back across the country when we do make the move.  So I have 2 little Santas and a couple of other little Christmas decorations.
Today, I decided to quit feeling sorry for myself and I needed to get in the Christmas spirit. So I do what I always do -bake.


This was my preliminary list of recipes:
Coconut macaroons
Baileys Thumbprint Cookies
My go to spicy Gingerbread Cookies
Decorated sugar cookies
Raspberry pie shortbread cookies
World Peace Cookies


I'm proud (or crazy) to say I baked most of them !  Ha, I skipped the World Peace Cookies (so if something goes awry in the world it's not my fault ) and I didn't get around to the raspberry shortbread either.  Baking does bring back so many wonderful memories.  I had the Steeler game on and the TV screened turned towards the kitchen so I could watch and cheer my team while mixing-and I didn't get any ingredients wrong !


My wish is that my family would show up on my doorstep to share these cookies-but that's a wish that needs a genie in a bottle. So instead, I'll share the cookies with our adopted family of neighbors, the police and fire department.  These are friends who stepped in when I was rushed to the hospital with a concussion and took Hailey under their wing.  They didn't have to-they hadn't even met us yet.  But they co-ordinated among themselves, and it relieved so much stress for Jim and myself not having to worry about Hailey.  And of course Hailey was spoiled to death.  These are good folks here and we will definitely miss them when we do move.


Now I'm into my second day of baking-remember that Christmas on the Oregon coast when I took cookies with me to decorate while the winter storms kept us inside.

These were some of the ones I created on the Oregon Coast that year !

 I look back at those cookies and think I must have had a temporary lapse of sanity.  Even though I did a lot this year, honestly I kept it kind of simple. Those of you who know me, know I'm an all or nothing kind of gal. Tried to change that about me,but decided I liked it -I like to throw myself into anything and everything I do with all the passion and love I can muster. And when it's time for the nothing at all side of me-well I can relax with the best of them !

Clockwise from about 9 o'clock-Coconut Macaroons-Baileys Thumbprints-Russian Tea Cookies aka Mexican Wedding Cookies.


Coconut Macaroons
Thank you David Lebovitz for this fabulous recipe

4 large egg whites
1¼ cups sugar
¼ teaspoon salt
1 tablespoon honey
2½ cups unsweetened coconut (see note)
¼ cup flour
½ teaspoon vanilla extract
2 ounces bittersweet or semisweet chocolate, chopped

In a large skillet, mix together the egg whites, sugar, salt, honey, coconut and flour.Heat over low-to-moderate heat on the stove top, stirring constantly, scraping the bottom as you stir.
When the mixture just begins to scorch at the bottom, remove from heat and stir in the vanilla. Transfer to a bowl to cool to room temperature.
(At this point, the mixture can be chilled for up to one week, or frozen for up to two months.)
When ready to bake, line a baking sheet with parchment paper or silicone baking mat and preheat the oven to 350 degrees F.Form the dough into 1 1/2-inch mounds with your fingers evenly spaced on the baking sheet. Bake for 18-20 minutes,(watch your oven carefully-my electric baked these quickly-12 minutes) until deep golden brown. Cool completely.
To dip the macaroons in chocolate, melt the chocolate in a clean, dry bowl set over a pan of simmering water (or in a microwave.) Line a baking sheet with plastic wrap. Dip the bottoms of each cookie in the chocolate and set the cookies on the baking sheet. Refrigerate 5-10 minutes, until the chocolate is set.Note: Unsweetened coconut is available in most natural-food shops or you can purchase it online.It goes under various names, such as coconut powder, medium shredded coconut, and coconut flakes. All will work well in this recipe.


Baileys Irish Cream Thumbprints
Recipe from Tutti-Dolce
2 2/3 cups flour
1/3 cup unsweetened cocoa
1/2 tsp salt
1 cup unsalted butter, at room temperature
1 cup sugar
1 large egg
2 tsp vanilla extract
Ganache
2/3 cup heavy cream
6 oz semisweet chocolate, chopped
2 oz bittersweet chocolate, chopped
2 Tbsp Baileys Irish Cream
Preheat oven to 350°F and line two baking sheets with silicone mats or parchment paper. Whisk together flour, cocoa, and salt in a large bowl. Beat butter and sugar with a mixer on medium-high speed until pale and fluffy. Beat in egg and vanilla, then reduce speed to low. Gradually add flour mixture and beat until combined.
Roll dough into 1-inch balls; place 1 inch apart on prepared baking sheets and press a well into the center of each with the handle of a wooden spoon. Freeze until firm, about 10 minutes. Bake for 7 minutes, then remove from oven and press centers again. Bake until firm, 5 minutes more. Transfer cookies to a wire rack to cool completely.
For the ganache, pour cream into a saucepan and bring just to a boil over high heat. Place chopped chocolate in a medium bowl; pour cream over chocolate and whisk until chocolate is melted and smooth. Cool 5 minutes; whisk in Baileys. Working quickly, use a spoon to fill each thumbprint with warm ganache. Let set before serving.
Yield – 54 cookies (more or less depending on what size you start with )


Russian Tea Cookies (aka Mexican Wedding Cookies)
Thanks to Crazy for Crust for this delicious recipe
Mom’s Russian Teacakes
Yield: 48 cookies(I doubled this recipe and it performed beautifully)

Ingredients
1 cup butter, softened
½ cup powdered sugar
1 teaspoon vanilla
2 ¼ cups flour
¼ teaspoon salt
¾ cup finely chopped nuts (pecans, walnuts, or almonds)
Powdered sugar for rolling
Instructions
1. Preheat oven to 375°. Line two cookie sheets with parchment paper.
2. Mix butter, ½ cup powdered sugar, and vanilla with an electric mixer until fluffy. Add flour and
salt and mix until the dough comes together. Stir in the nuts. If dough is too soft, chill it until you
can work it easily with your hands.
3. Scoop 1 tablespoon balls of dough and place on prepared cookie sheet.
4. Bake cookies for 7to 8 minutes until bottoms are just slightly brown. Remove from oven and cool
for just a minute, until you can handle them. Fill a small bowl with powdered sugar and roll each
cookie in the sugar until coated. Place on a rack to cool. (Once cookies are cooled, you may
want to re roll them in more powdered sugar to give them a beautiful powdery dusting.)

Love the edible gold glitter stars

You can find my sugar cookie recipe here:
 http://seattlepastrygirl.blogspot.com/2010/12/sugar-cookie-palooza-on-oregon-coast.html


And my gingerbread recipe here:
http://seattlepastrygirl.blogspot.com/2010/12/gingerbread-christmas-cookies.html


Wishing you all a Happy Holiday and Merry Christmas and Happy Chanukah.


Tuesday, November 4, 2014

Bomb's Away with Dirt Bombs


I get the Bon Appetit newsletter emailed to me.  I usually just peruse the summary ,unless something really catches my eye.  And these little babies did.  Anything with a dipping of cinnamon sugar will always catch my eye.  I started to wonder why I had this addiction to cinnamon-where did it come from ?  When I go through my recipes on file there are more cinnamon roll recipes than I could every try in a month; there are cinnamon scones; cinnamon cupcakes; cinnamon bread; you get the picture.


 While pondering this addiction, I remembered where it came from.  Growing up,  one of the favorite things my mom made us in the morning was cinnamon toast.  Nothing fancy, just a couple slices of Wonder Bread,toasted,buttered then sprinkled with a ton of cinnamon and sugar .  Then we would take our knives and spread the cinnamony sugar goodness all over the bread until it was well blended.  I'm sure none of this was healthy-I mean really white Wonder Bread ?  I'm surprised we all didn't balloon up like the Michelin Man. I would love to say that this was a treat after eating some very healthy breakfast-but no it wasn't it was a normal occurrence ! So in honor of my childhood memories I give you Bon Appetit Dirt Bombs (they are really like a donut muffin), but Dirt Bombs sounds like so much more fun ! Enjoy.


DIRT BOMBS
May 2014 Bon Appetit-Makes 12
Muffins can be made 6 hours ahead. Keep tightly wrapped at room temperature.

INGREDIENTS
Muffins
Nonstick vegetable oil spray
2¼ cups all-purpose flour
2 teaspoons baking powder
1 teaspoon kosher salt
½ teaspoon ground nutmeg
½ cup (1 stick) unsalted butter,room temperature
¾ cup sugar
1 large egg
1 cup whole milk

Topping
½ cup sugar
1 teaspoon ground cinnamon
6 tablespoons (¾ stick) unsalted butter, melted


PREPARATION:

MUFFINS
Preheat oven to 375°. Coat a standard 12-cup muffin pan with nonstick spray. Whisk flour, baking powder, salt, and nutmeg in a medium bowl; set aside. Using an electric mixer, beat butter and sugar in a large bowl until light and fluffy, about 4 minutes. Beat in egg. With mixer on low speed, add dry ingredients in 3 additions alternating with milk in 2 additions, beginning and ending with dry ingredients. Divide batter among muffin cups and bake, rotating pan halfway through, until a tester inserted into center comes out clean, 30–35 minutes. Let cool 5 minutes in pan, then transfer to a wire rack.
TOPPING AND ASSEMBLY
Mix sugar and cinnamon in a medium bowl. Working one at a time,
dip tops of muffins in melted butter, then cinnamon sugar.

Warning-these are extremely addictive.  Also, if you don't wrap them too tight and they start to get a little hard-pop them in the microwave for about 30 seconds-hmmm warm and tasty like they just came out of the oven.  Bon Appetit.


Thursday, October 30, 2014

Apple Blackberry and Thyme Hand Pies-Hello Stranger


I know, I know, I have so neglected this blog.  And to my friends-I am so sorry.  You know a lot has happened since last year.  We sold our house in Seattle; (remember in 2012 we bought Ruby the Roadtrek); we bought a condo in Florida; we camped our way from Seattle to Cape San Blas; remodeled the condo;  I fell off a ladder-ended up in intensive care for a few days; as a result of the fall discovered I needed a pacemaker; had to have the pacemaker surgery redone since the leads incorrectly wrapped around the device ;rented the condo out for the summer while we traveled to the Keys and finally have returned to settle in for a few months of Florida Winter on the coast.


Whew,definitely has not been a boring 2 years.  But I do feel badly that I have skipped out on this blog while I devoted all my attention to the previous mentioned events and to my Roadtrekgirl blog.  Well-I'mmmmmmmmm baaaaaaaaaaaack !   Even though I'm over 2500 miles from Seattle, I will always be Seattlepastrygirl! So I'm keeping the name while I bake and cook in hot and humid Florida.


With Fall upon us I've been missing that crispness in the air that we enjoyed on the West Coast.  Here in Florida we get a little chill in the evening but it's been in the 80's during the day.  But today it's raining and I thought I would warm up the house and bring back those Fall memories with some apple pie.  But no ordinary pie-I love making the little hand pies so that's what I decided upon.  Apple because I miss the apple trees that were in front of our house in West Seattle.  Every Fall I would gather the apples and make oven baked apple butter-the house smelled incredible and the apple butter was the best I've ever tasted


I felt experimental so I thougth I would add blackberries to the mix along with some seasonings and jam .  The following recipe is my own for the filling and a million zillion thanks to Smitten Kitchen and her wonderful All Butter, Really Flaky Pie Dough !  Hope you try the recipe, if you do let me know what you think of the flavors.


Apple Blackberry Thyme Hand Pies

1 recipe of Smitten Kitchen's pie crust
All Butter, Really Flaky Pie Dough-love her recipe for these -make sure you check out her blog it's incredible.

Makes enough dough for 16 3inch hand pies

2 1/2 cups flour
1 tablespoon  sugar
1 teaspoon  table salt
2 sticks (8 ounces, ) unsalted butter, very cold

Gather your ingredients: Fill a one cup liquid measuring cup with water, and drop in a few ice cubes; set it aside. In a large bowl — I like to use a very wide one, so I can get my hands in — whisk together 2 1/2 cups flour, 1 tablespoon of sugar and a teaspoon of salt. Dice two sticks (8 ounces or 1 cup) of very cold unsalted butter into 1/2-inch pieces. Get out your pastry blender.

Make your mix: Sprinkle the butter cubes over the flour and begin working them in with the pastry blender, using it to scoop and redistribute the mixture as needed so all parts are worked evenly. When all of the butter pieces are the size of tiny peas — this won’t take long — stop. Yes, even if it looks uneven; you’ll thank me later.

Glue it together: Start by drizzling 1/2 cup (120 ml) of the ice-cold water (but not the cubes, if there are any left!) over the butter and flour mixture. Using a rubber or silicon spatula, gather the dough together. You’ll probably need an additional 1/4 cup (60 ml) of cold water to bring it together, but add it a tablespoon as a time. Once you’re pulling large clumps with the spatula, take it out and get your hands in there (see how that big bowl comes in handy?). Gather the disparate damp clumps together into one mound, kneading them gently together.

Pack it up: Divide the dough in half, and place each half on a large piece of plastic wrap. I like to use the sides to pull in the dough and shape it into a disk. Let the dough chill in the fridge for one hour, but preferably at least two, before rolling it out.

Do ahead: Dough will keep in the fridge for about a week, and in the freezer longer. If not using it that day, wrap it in additional layers of plastic wrap to protect it from fridge/freezer smells. To defrost your dough, move it to the fridge for one day before using it.


Filling:
4 medium Gala Apples-diced (not my preferred apple-use what you like)
4ounces fresh blackberries-chopped -I had large berries so I just quartered them
4 ounces blackberry jam ( I substituted Cassis Blackcurrant jam)
Zest from 1 lemon
1/4 cup sugar
2 Tablespoons brown sugar
3 tablespoons cornstarch or flour
1/2 teaspoon sea salt
1 Tablespoon cinnamon
1 teaspoon ground nutmeg
1 teaspoon ground allspice
3 Tablespoons fresh finely chopped Thyme
Pinch of ground ginger

Ingredients for Assembly:
1 Tablespoon water
1 large egg
1 egg white beaten lightly
Coarse sparkling sugar  for finishing (about 1/2 cup)

Filling prep:
Peel,core and dice apples. Add quartered blackberries to diced apples along with jam. (stir your jam to soften it out of the jar before mixing in with the apples and blackberries).  Whisk sugars,cornstarch,sea salt,Thyme and spices in separate bowl.  When evenly whisked together sprinkle over your fruit mix -add lemon zest and mix everything together into spices are incorporated with the fruit. Set aside.


Assembly:
Beat 1 large egg  with 1 Tablespoon water for "gluing your pie dough circles together"
1 beaten egg white for brushing on your hand pies before sprinkling on the coarse sugar
Remove one of the dough rounds from the refrigerator.Roll the dough into a circle about 1/8 inch thick. With a 3 inch  pastry cutter circle cut out as many circles as you can from the rolled dough-but cut an even number because 1/2 will be the base and 1/2 will be the cover.
Divide the filling among eight of the circles, using about a heaping tablespoon for each (it helps if you use a slotted spoon for those so some of the liquid can be drained before placing the filling on the circle). Brush some of the beaten egg along the edges of each filled circle.
Cut a vent into the each of the remaining eight circles, using a decorative cutter of your choice.(I did half with a star cutter and with the other half I just used a paring knife and put a few slits in the top of each hand pie-I liked the slits better)
Top each filled circle with either a vented circle,or a solid circle and use the paring knife to add a few vent slits.  Then press along the edges with the tines of a fork to seal.
Brush the top of each pie with the lightly beaten egg white, and sprinkle with sparkling sugar. Transfer the pies to the prepared baking sheet. Place the pies in the refrigerator to chill for 30 minutes.
Repeat the process for the 2nd dough round. (It was quite the challenge to keep my dough from softening-I kept putting it back in the refrigerator-then I would pull it out-roll a little-then back in the refrigerator-fun!)

Preheat oven to 425F.  Bake pies at 425 for 10 minutes. Reduce oven temperature to 375F and bake for an addition 15-20 minutes,until crust is deep golden brown. (this time may fluctuate depending on your oven). Rotate the pans about every 10 minutes. I baked mine on the center rack.
Remove from oven and carefully transfer pies to wire rack and let cool for at least 20 minutes (if you can ! ) before eating.


Bon Appetit !

PS.  These taste so much better the 2nd day- the Thyme really has a chance to develop a great flavor with the rest of the spices-see if you can hold off not eating them all the 1st day !


Sunday, April 21, 2013

Buttermilk Cupcakes and Believing


Hasn't this just been one hellacious week ? The Boston Marathon Bombing; the ricin threat in Washington DC and the horrific explosion in West, Texas.  I couldn't bear to read the online news this morning-sometimes it's just too much.  I cannot even imagine what those involved have been going through.  I can only offer my thoughts and prayers and keep them in my heart.

Last night when J and I were out walking, we passed two little 8 year old boys playing in a front yard.  Just seeing the innocence in their faces pierced my heart and took my breath away.  I don't have children but I thought about the mother inside that house, cleaning up after dinner, doing all those little things that we take for granted.  I tried to imagine myself with those two little boys and it hurt to think about how quickly life can change.  How in an instant that sweet little scene of the two boys playing could turn into an unfathomable emptiness. My heart goes out to everyone whose life has been changed drastically by the events of this week. Even more importantly this week has been another reminder of how important it is not to take anything for granted-reach out and tell someone every chance you can how much you love them or value them. And believe that as corny as it may sound good will always triumph over evil. And the number of good people far outnumber the bad.  Go out and share your goodness and enjoy your life to the fullest.


I started the baking process for these cupcakes before the bad guy was captured by the amazing law enforcement community of Boston.  My heart wasn't in them when I started and now I am so grateful for how it ended. Peace and love to you all.

Buttermilk Cupcakes: 
Nigella Lawson's 'Heavenly Buttermilk  Cake' from Paris Loves Pastry
With the sweet little containers I used, I got 14 cupcakes from this recipe


Ingredients: 1 ⅔ cups all-purpose-flour 1 ½ teaspoons baking powder ½ teaspoon baking soda ¼ teaspoon salt ¾ cups + 2 tablespoons buttermilk (or you can use ⅓ cup plain yogurt mixed with ½ cup low-fat milk) 1 ½ teaspoons vanilla extract ½ cups soft unsalted butter ¾ cup sugar 3 large eggs room temperature

Instructions:
- Preheat the oven to 350˚F
- Sift flour, baking powder and salt together into a bowl and set aside. Pour the buttermilk into a measuring cup and stir in the vanilla. Cream the butter and sugar in a large bowl with an electric mixer at medium speed until it's light and fluffy. Reduce the speed  to low and add the eggs one at a time, beating for 30 seconds between additions. At this point the batter will look like it's breaking but don't worry -the flour will bring it together.  Add alternating increments of the flour mixture and the vanilla-buttermilk, blending well after each addition, ensuring that you finish with the addition of flour; this should take 3 to 5 minutes.
- Fill the cupcake liners ¾ full and bake for 15 to 20 minutes or until a cake tester comes out clean.


Chocolate Buttermilk Frosting

(Makes about 4-5 cups)
4 ounces unsweetened chocolate, melted and cooled slightly
2 sticks butter, at room temperature
5 cups (20 ounces) powdered sugar
1/4 cup (3/4 ounce) cocoa powder
1 teaspoon vanilla
1/3 cup buttermilk


In a large bowl, cream together the melted chocolate and butter until smooth and creamy. Add the powdered sugar, cocoa powder, and vanilla, and begin mixing. Slowly add in the buttermilk until the frosting reaches your desired spreading consistency. If the frosting is too stiff, add a few more drops of buttermilk.


PS I saw these sweet little cupcake holders over on Sonia's blog,click HERE.  She has a PayPal account and shipped them from Malaysia so the postage is actually more than the cost of the containers.  I searched the Internet for them but she is the only one I could find who was selling them. Check out her store on her website-very reliable and quick response and shipping.

Sunday, March 31, 2013

Lemon Ricotta Doughnuts


I cheated here, I added a dollop of leftover filling to the doughnut !

I wasn't paying attention the other day when I placed my order with Amazon Fresh and ended up ordering twice the amount of Ricotta I needed. So here I am with extra Ricotta , what should I do with it?  Off to Google Land I go. After searching and searching this recipe caught my eye : Baked Lemon Ricotta Doughnuts. Hmm,baked doughnuts-well that's healthier than fried, right ? Filled with a Lemon Ricotta filling-yum that will use up my leftover Ricotta.  Dusted in lemon sugar-okay I'm sold.

This is what they really look like out of the oven, the filling permeates the center of the doughnut, so you have a moist ricotta center.

Next time I make these I will do a few things differently.  #1 Freeze the little scoops of ricotta filling-being a soft cheese the ricotta melted into the doughnut,still delicious, but I prefer to find a nicely filled center when I bite into a doughnut.  I think if the ricotta filling is frozen to a truffle type consistency-not rock hard-it would soften nicely while baking. #2, I would not mix the lemon zest with the sugar until I dried out the lemon zest a bit.  The moisture in the lemon zest makes the sugar clump. Either that or wait until the very last minute to mix up the zest and sugar.  And #3, I would probably try a nice lemon glaze instead of the sugar and sprinkle the zest over it while the glaze was still wet.


The doughnuts are delicious straight out of the oven, but then again what isn't ?  The next day they were a little dry but a quick 30 seconds in the microwave solved that problem.  This is a really good recipe and I love the dough-seems like you could make some really good savory doughnuts with it. It bakes up  like a fluffy biscuit. Maybe I'll try some feta filling with spinach and work some sun dried tomatoes into the dough.  Oh the possibilities are endless.

After coffee and a doughnut I'm off for a long, long walk.  Maybe if I add another mile to my walk I can justify a doughnut for dessert tonight.  Remember  I'm the  Queen of Rationalization !   Bon Appetit.


Baked Lemon Ricotta Doughnuts

5 cups all purpose flour, plus extra for dusting
½ cup plus 3 Tablespoons super fine sugar (Baker’s Sugar in grocery stores)
1 package of yeast
Zest  of 2 lemons
1 cup lukewarm whole milk plus  extra for brushing
1/3 cup buttermilk at room temperature
2 eggs at room temperature
2 Tablespoons (1 ounce) butter, melted

Lemon Ricotta Filling
8 ounces Ricotta
1/4 cup sugar
Zest and juice of 1 lemon
1 large egg

Finishing
8 Tablespoons unsalted butter
1 cup super fine sugar
Finely grated zest of  2 lemons

Prepare one large or two medium sized baking sheets with parchment paper or Silpats.
Combine flour, sugar, yeast and lemon zest in the bowl of an electric mixer-use a whisk to combine. Once combined fit the mixer with a dough hook. In a separate bowl whisk together warm milk, room temperature buttermilk and eggs and the melted butter. With the mixer running on slow, add the liquids to the flour mixture, then mix on medium speed until dough is smooth and elastic (about 4-5 minutes). Shape the dough  into a ball, place in a lightly oiled bowl, cover with plastic wrap and let stand in a warm place until doubled in size (1 – 1 1/2 hours).

Lemon Ricotta Filling
Whisk together ricotta, sugar, lemon zest, lemon juice and egg just until smooth. Transfer the mixture to an airtight container and chill for at least 1 hour.
The Dough
Gently punch down the dough and turn onto a lightly floured surface. Roll the dough out to ¼ inch thickness or just slightly under (5mm thickness). Cut out 24 rounds using a 3” cutter. Cut out another 24 rounds using a 2” cutter. Place a heaping teaspoon of lemon ricotta filling in center of 24  2” rounds. Brush edges of the 2” rounds with milk, cover with the remaining rounds 3” rounds and press firmly to seal the edges. Trim with the 2” cutter. Transfer to baking sheet(s), cover and let stand in a warm place for 1 – 1 1/2 hours.

Preheat oven to 375 degrees. Bake the doughnuts for 10-12 minutes until the bottoms are golden-the tops will bake up with just a blush of brown.

For the finishing garnish, melt the 4 ounces of butter and set aside. For the lemon sugar, place the sugar and lemon zest in a bowl of a food processor and pulse until the sugar is aromatic. Pour into a bowl and fluff with a fork or a whisk.

Once you remove the doughnuts from the oven dip the hot doughnuts immediately in the melted butter and then toss in lemon sugar. Serve warm.